FAST-START BRANDING
When using the default QuoteValet template, there is “QuoteValet-specific” branding in the CSS. These can be easily removed with a few tweaks to the styles as shown below. If you need any further customizations to your QuoteValet template and CSS beyond what you can accomplish in-house, then you can reach out to our Professional Services team (http://www.quotewerks.com/prices.asp#Professional).
UPLOADING COMPANY LOGO
The first step most customers want to accomplish when setting up their QuoteValet is to upload their company’s logo. First, ensure that your logo is in in JPG format and is less than 100kb in file size. It is suggested to have the logo dimensions be no larger than 300x300 pixels for best performance on the various QuoteValet templates.
To upload the logo, simply go to Tools à Options, and then the QuoteValet tab. Click the QuoteValet Setup button, and the General tab.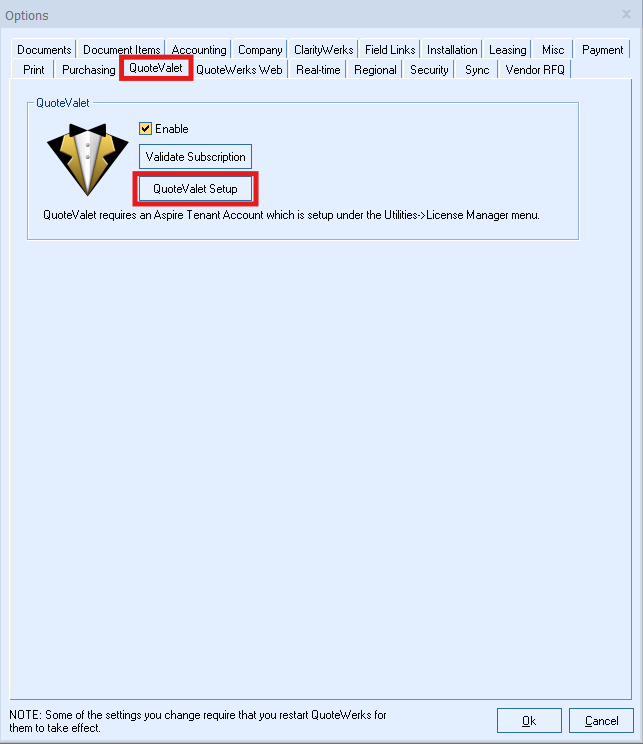
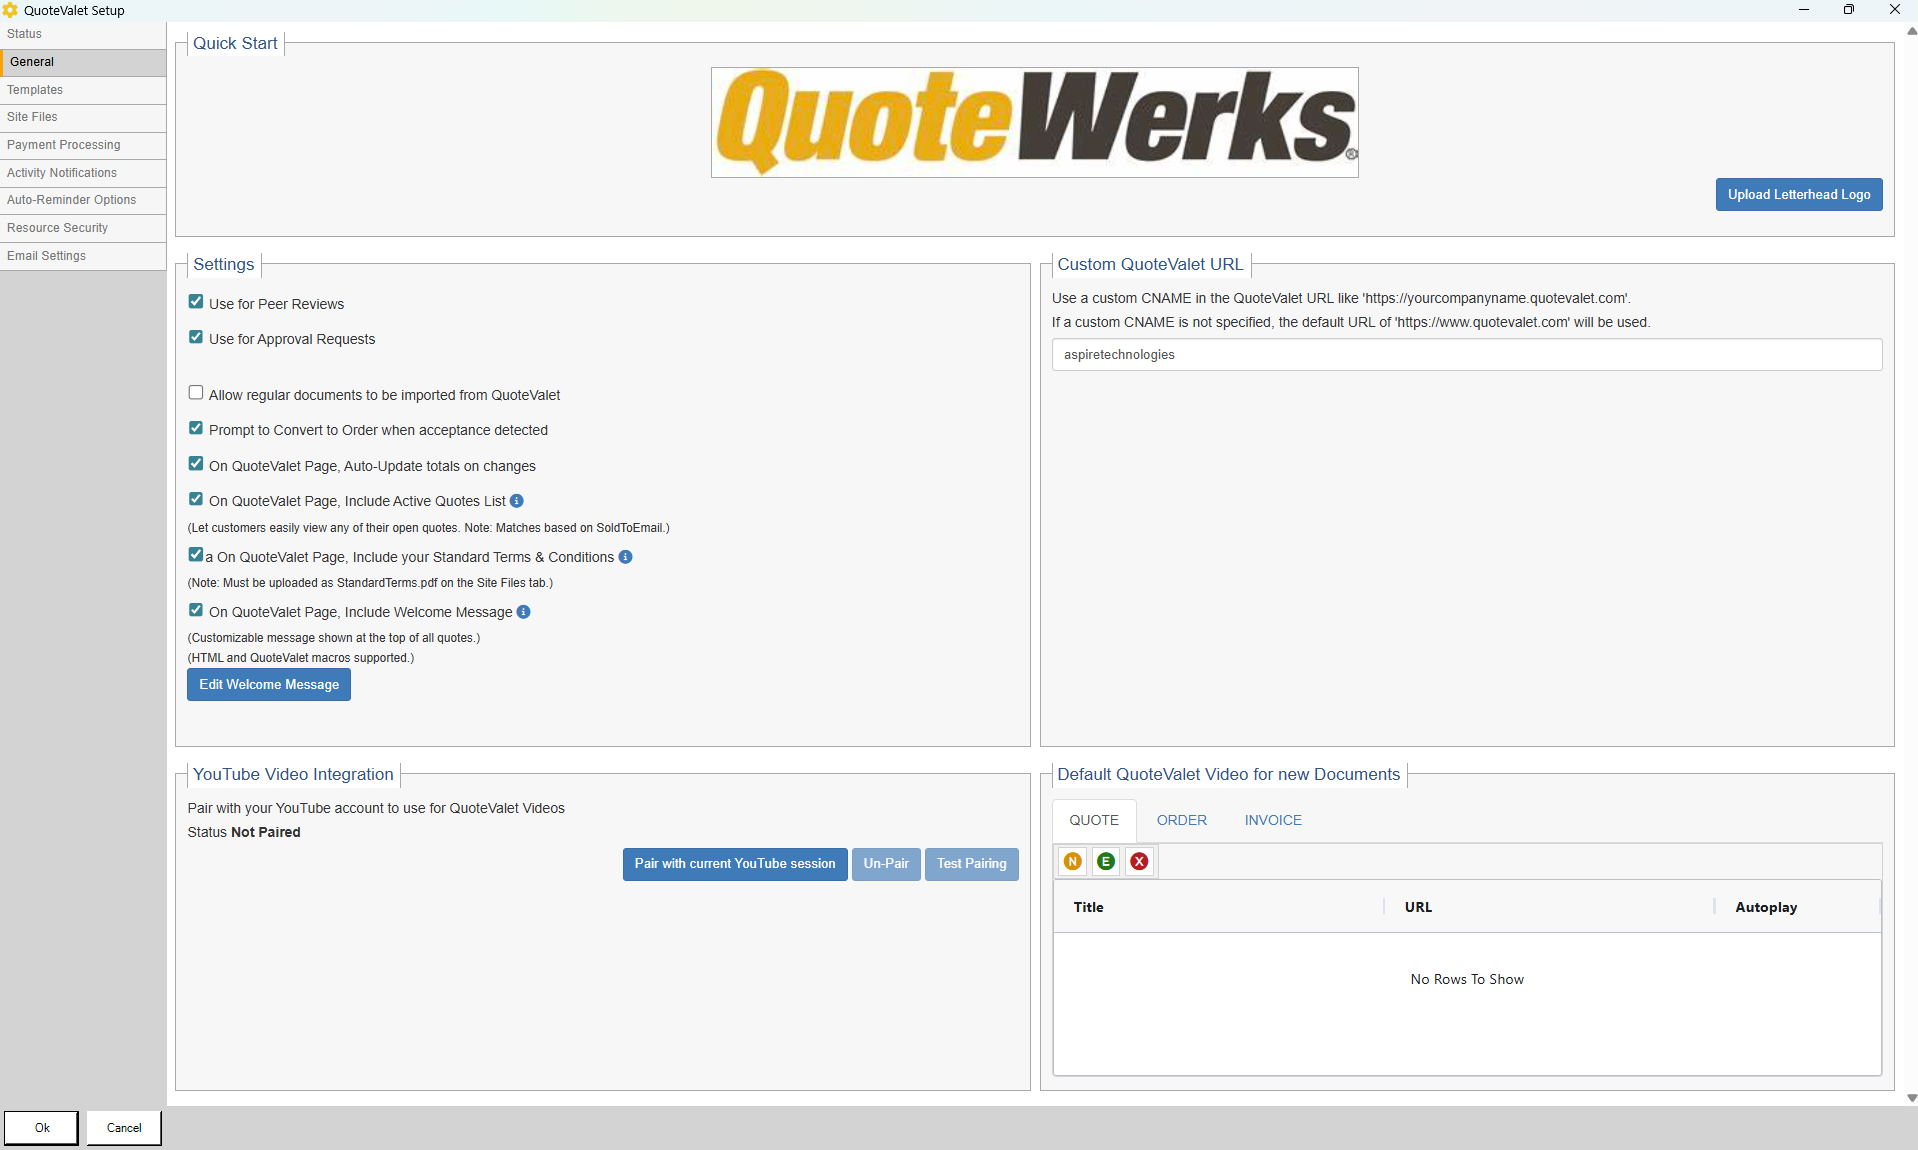
On this tab, click the button titled, “Upload Letterhead Logo”. This will bring up a Windows File Explorer dialog to search your system/network for your company logo. Once selected, click OK. This will upload the image file. If you already have a QuoteValet document open, you can hit CTRL+F5 to clear your browser cache and refresh the page. Your company logo should now be visible.
REMOVING HEADER BRANDING
The default CSS file that QuoteValet uses contains the QuoteValet logo. This can be easily removed by uploading a customizations.css that removes this element. This file has been built for you, and can be accessed from the Site Files tab in your QuoteValet Setup.
In QuoteWerks, navigate to Tools à Options à QuoteValet, and click the QuoteValet Setup button. In the QuoteValet Setup Window, select the Site Files tab. Download the "sample-customizations.css" file from the Site Files window and save it to the \QuoteWerks\QuoteValetSiteFiles folder.
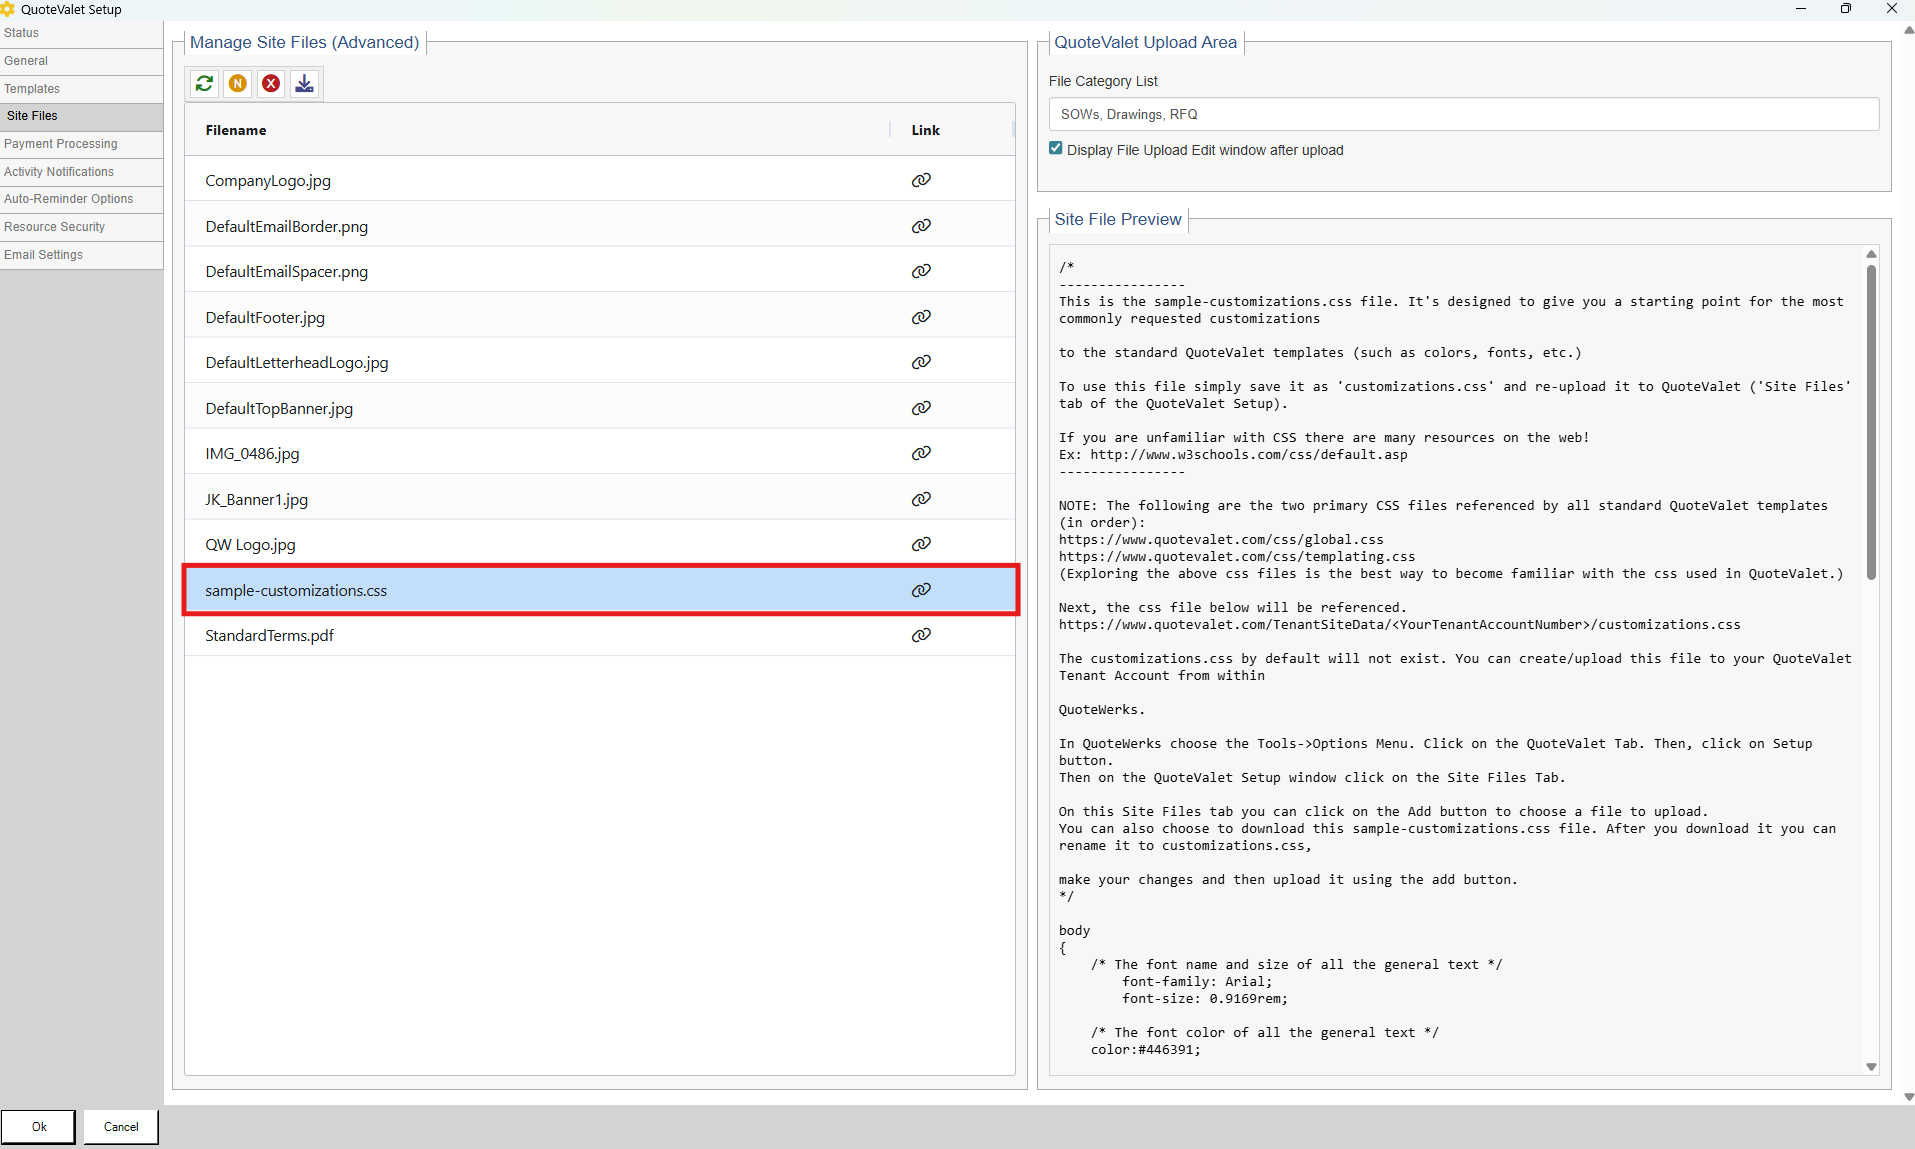
Rename the file from "sample-customizations.css" to "customizations.css".
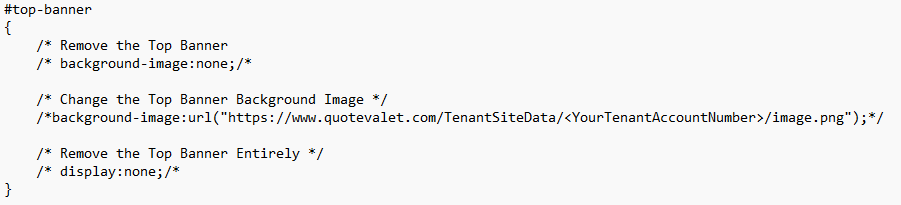
Find the section #top-banner and change
/* Remove the Top Banner Entirely */
/* display:none; */
to
/* Remove the Top Banner Entirely */
display:none;
Then, in the Site Files tab, upload the newly renamed "customizations.css" file. This will replace the existing customizations.css file for your QuoteValet account. Once this is completed, if you refresh your quote page (CTRL+F5) in the browser window, you should see the QuoteValet banner has been removed.
ADDITIONAL CSS SETTINGS
The Sample Customizations file included with QuoteValet has some additional CSS setting to allow you to quickly adjust some of the main styles of your QuoteValet page.
Body Section
The first section you will see in this file is the body section. Under this section you can set font settings, font color, and page background color.
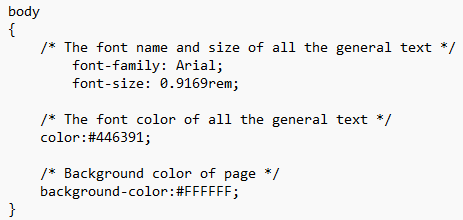
Font
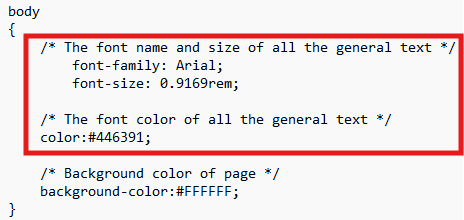
With the font-family tag, you can specify the font you wish your page to display in. Best practices are to use standard Windows fonts such as Arial, Times New Roman, Verdana, etc.
With the font-size tag, you can specify the overall font size for the majority of the text on the page. This value is in pixels by default but you could also use points. So for example, 12px or 9pt.
The color tag allows you to specify the overall font color for the majority of text on the page. You can set this value in the Hex code like in the example for the most specific colors, or you can use the color name, such as color: red;
Background Color of the Page
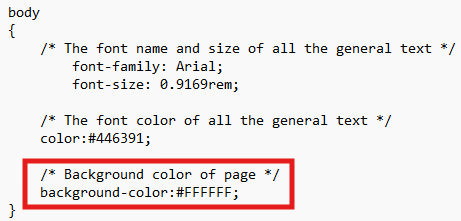
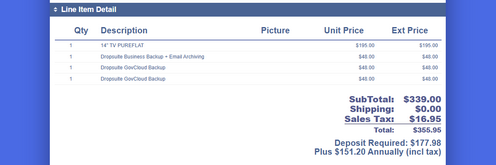
With the background-color tag, you can specify the color of the page background. The Quote lines area will still be white. Similar to the font color, you can either use a Hex color, or a color name. For example, background-color: royalblue; would give a background result similar to below:
#top-banner
The #top-banner section has three options in it.
The background-image tag allows you to change the banner image. The html path in the sample is an example. To enable this setting, you will need to comment out or delete the background-image: none; and un-comment this line. So for example:
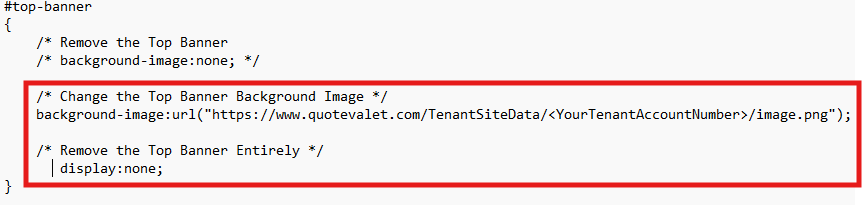
If you wish to remove the top banner completely, you would need to un-comment the display: none; line and either delete or comment the background-image lines similarly.
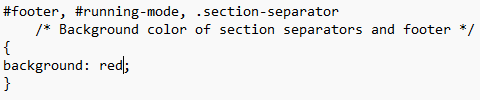
Section Colors
The last section allows you to define a specific color for the section separators, top banner, and footer.
You can set this value in the Hex code like in the example for the most specific colors, or you can use the color name, such as background: red;